

If Jenkins is exposed to the internet then it is a nightmare. Open ports, brute-force attempts, credential stuffing, it is a target the moment it is reachable. So, I needed auth in front of it without the overhead of a VPN or managing SSH tunnels.
Cloudflare Access solved it in under 15 minutes. Here is exactly what I did.
What this setup does?
User → jenkins.cloudflareaccess.com → Cloudflare checks identity → JenkinsCloudflare sits in front of Jenkins and intercepts every request. If you are not authenticated, you see a login screen not Jenkins. Your server never deals with unauthenticated traffic.
No VPN. No cloudflared daemon. Just DNS + Cloudflare Access.
Prerequisites
- A domain managed by Cloudflare
- Jenkins (or any internal app) running on a server with a public IP
- A Cloudflare account (free tier works)
Step 1: Point your Domain at the Server
In Cloudflare DNS, create an A record:
| Type | Name | Value | Proxy |
|---|---|---|---|
| A | jenkins | your.server.ip | ✅ Proxied (orange cloud) |
This makes jenkins.yourdomain.com resolve through Cloudflare not directly to your server. The orange cloud is important it means Cloudflare is in the middle.
Step 2: Enable Zero Trust
- Go to dash.cloudflare.com
- Click Zero Trust in the sidebar
- Pick a team name — this becomes
yourname.cloudflareaccess.com
Step 3: Create an Access Application
Go to Access → Applications → Add an Application → Self-hosted
Fill in:
- Application name: Jenkins
- Application domain:
jenkins.yourdomain.com - Session duration: 24h
Click Next.
Step 4: Add a Policy
This is what controls who gets in.
- Policy name: Team access
- Action: Allow
- Include rule: Emails ending in
@yourdomain.com
Or if you want to allow specific people only:
- Include rule: Email —
colleague@gmail.com
Click Next → Save.
Step 5: Set up One-Time PIN (Email OTP)
Go to Settings → Authentication → Login methods
Click Add new → One-time PIN. That’s it, no OAuth app setup, no client secrets. Cloudflare handles sending the login code to the user’s email.
This is the simplest identity method. The user enters their email, gets a 6-digit code, enters it and they are in (if their email matches your policy).
What it looks like?
Anyone visiting your Jenkins URL now sees this instead of Jenkins:
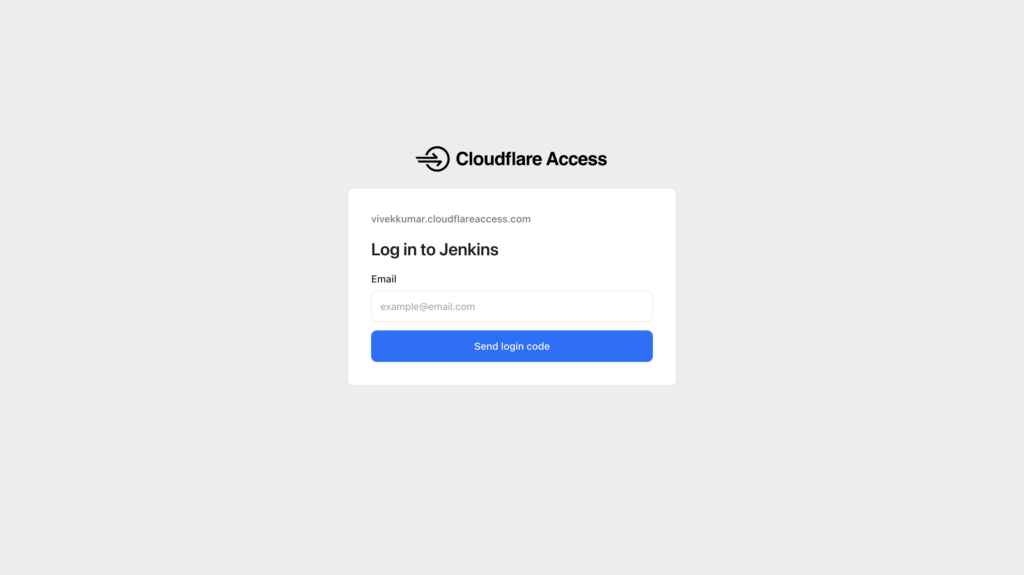
They enter their email → get a code → enter it → land on Jenkins. Unauthorized emails get nothing.
That’s It
No daemon to run. No VPN client to install. No certificates to manage.
The whole thing is:
- DNS A record → point domain to server (proxied)
- Zero Trust → create application for that domain
- Policy → allow emails you trust
- Auth method → One-time PIN
Every access attempt is logged in Zero Trust → Logs → Access with the user’s email, timestamp and whether they were allowed or denied.
When to use This vs a Tunnel?
| Situation | Use |
|---|---|
| App has a public IP | DNS + Access (this guide) |
| App is fully internal, no public IP | cloudflared tunnel + Access |
If your server is behind NAT or a private network with no public IP, you would need the tunnel approach. But if it is a regular VPS or cloud instance, this simpler DNS method works perfectly fine.
Hope it was informative. Happy Coding!!!